This is a typical 3x3, 3 wall shower installation. It features 12x12 Multicolored Slate shower walls, with a acrylic shower base. I should mention that this multicolored variety has not received the CE endorsement of the BSI for roofing shingles. If you're interested, see the Brazilian Slate Report.
| In this photo, the cement board has been installed, taped and finished with polymer modified thin-set. An unintended side effect of the ceiling truss angle, is this bit of interest at the ceiling of an otherwise typical, 3 wall shower installation. |
In this photo, I've installed Schluter's Decoupling and Crack Suppression Membrane, otherwise known as DITRA on the bathroom floor. It's gotten very good reviews and Schluter enjoys a solid reputation in the tile installations industry. I've only recently started using this product as I'm hesitant to adopt new technology that isn't field tested for a decade or more. |
In this photo, you can see thickness variations which is one of several inherent challenges associated with slate installations. It's been a less common in recent years due to increased industry gauging and calibration efforts but it's still something that is an issue. |
Despite the inherent characteristics of size and thickness variations, Slate is quite pretty when properly installed. Due to inherent variations in size, thickness and squareness, it's one of the few finishes that I install with a 1/4 inch grout joint. My typical tile installation grout joint is 3/16 or less. It just looks better with a smaller grout joint to me. |
In this image, the walls have been installed and still quite dirty. Five minutes with a sponge and a bucket of clean water, will be all it takes to make it shine. |
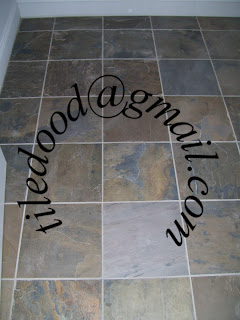
| In this photo, the floor has been installed and is awaiting grout. The color and texture variations of this slate are rather impressive, considering it's really just 600 million year old mud! |
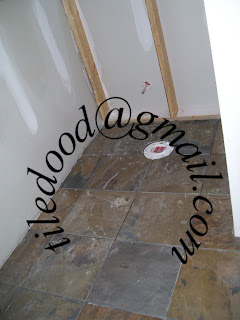
This image shows the slate floor installation and the toilet flange in the water closet area of the bathroom. It also shows an odd wall re-frame that I can't explain. I can only surmise that it was necessary as few people in the construction industry do anything above or beyond that which they absolutely have to do! |
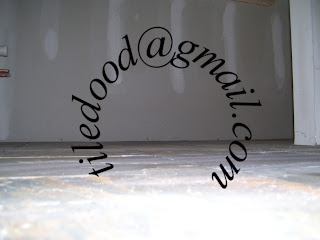
I like photos like this one. It shows a inline view of the horizontal plane of this floor. With this perspective, any mistakes in elevation height, stand out like a sore thumb. This is a nice flat floor that is only so, because I took the time to make it that way. |
In this image, the grout has been applied, washed, and cured on the slate walls in this shower. After a final cleaning and sealing, it will be finished. It's pretty amazing how much work actually goes into this type of installation. |
In this photo of the floor, the slate has been installed, grouted and cleaned. It will take one final cleaning and a quality sealer before it's completely finished. |
If you made it this far, thanks for reading.


Busy at home with a much similar slate tile shower instillation. Due to the varied thickness in tile sizes, I have found the corners to have rather deep gaps in the grout line. Is this normal?
ReplyDeleteHi! Thank you for your interest. It's normal for the grout line in a slate installation to vary in depth and width, depending on the size and thickness of the adjacent slate tiles. It takes a bit of flipping and adding/removing setting material to get a mostly flat installation. Hope that helps and thanks again.
Delete